Let me show you how my first batch of tempeh came out, and how to start a new one:

Rhizopus oligosporus mycelium beginning to grow.
24 hours after the tempeh workshop–right on time–I began to see the white mycelia of Rhizopus spreading and beginning to bind together the soybeans.

33 hours after inoculation.
By 11pm that evening, most of the surface of the beans was covered by the downy fungus. I probably could have left it longer, but I wanted to go to bed, and didn’t want the tempeh to become over-mature. (I started my new batch, see below, a little earlier in the day to avoid this problem.) I put it in the fridge until I wanted to use it, a couple days later. (No photos of that because we were too hungry to remember to take a picture. But we made this, and it was good.)

The finished tempeh!
The finished tempeh was good and firm. It sliced well–I could have sliced it very thin without it crumbling. It smelled sort of like bread or fresh, earthy mushrooms. It was dry and not slimy at all. These are all the qualities you are looking for. If anything seems off, toss it and start over. As Papah said at the tempeh-making workshop I attended last week, Rhizopus oligosporus is basically like the mold that grows on bread. (In fact, Rhizopus is a genus that includes a few molds that grow on bread and fruit.) But unlike those molds R. oligosporus is a “friendly” mold! When you meet it, you will know it’s good to eat!

Soaked, cracked and hulled soybeans, ready to cook.
Well, that batch was inoculated by Papah at Bandung. All I did was incubate it. I’ve now started a new batch from scratch. I began with already cracked and hulled soybeans that I got at the workshop. If you can only find whole beans (which I will also have to use when these run out) you’ll have to squeeze the beans to remove as many hulls as possible. Yesterday, I covered about a pound (a little under 2 cups) of the dry beans with water, brought it up to a boil, and then took it off the heat to soak for about 6-8 hours. You could just soak them over night. By this time they were still crunchy and inedible. Then I boiled them for about 45 minutes, until they were just cooked through. You do not want them to get mushy, as the process of fermentation softens them bit more.

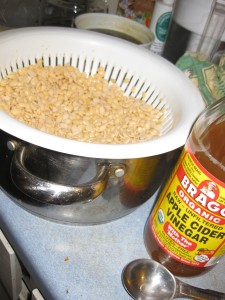
Add 1Tbs vinegar to the beans and dry them.
Then I drained the beans and added a tablespoon of vinegar. This will help create an inviting environment for Rhizopus, but not other microorganisms.
Next is a very important step: dry the beans. I used a towel and, following Papah’s suggestion, a hairdryer. You want the beans to be just dry to the touch. Papah described it this way: you are trying to grow Rhizopus, and the beans are like the soil in a garden. It can’t be too wet. The moisture the Rhizopus needs is inside the beans, not on the surface, or it is too waterlogged. Wet beans are a common cause of tempeh failure.

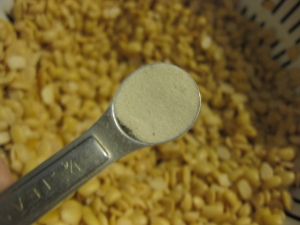
When the cooked beans have cooled and are dry, add 1/4 tsp of the culture.
When the beans are dry on the surface, add 1/4 tsp of the tempeh culture (or follow package instructions–I think some manufacturers add filler to help it spread). You can buy the culture here, they even have free samples! Make sure you sprinkle the culture evenly, and mix gently so that it is spread throughout the beans.

Close up of holes in plastic bag.

Add the inoculated beans to a plastic bag that has been pierced full of holes.

Ready to incubate.
.
.
.
Now, prepare your container. Using a needle or a skewer, poke holes into a small ziplock bag–about half inch apart. This will allow the tempeh to “breathe.” Without circulation, moisture can build up on the surface of the tempeh and make it go bad.
Fill the bag with the inoculated beans and flatten into the thickness that you want your temph to be. You can fold over an edge of the bag to make thicker tempeh. I put my tempeh on a cooling rack on top of a cookie sheet, and into my gas oven. With the oven off and the door propped open, the temperature stays around 85°.
I will be checking the temperature through the day to make sure it doesn’t get too high–trying to keep it below 90°. As the tempeh ferments, it creates its own “body heat.” If it gets too hot it can kill the Rhizopus, or create too much condensation and produce poor-quality tempeh.
This is the first batch of tempeh that I’m making from scratch, so wish me luck and check back in a day!


